
 20 X 20 canvas giclée with a larger piece of black Kraft paper under it.
 What follows is pretty much verbatim from Section Two: Giclee Work Flow - Step Twelve in my book, Giclée Prepress - The Art of Giclée. There are updates in my blogs about the Arrow® Power Shot and staplers in general.
[New readers please note that the purpose of this blog is to provide updates on the book Giclée Prepress - The Art of Giclée (www.gicleeprepress.com) as well as expand its scope and contents.]
Stretching Canvas
Plenty of room is needed to stretch canvases; more than you think. Flipping, swinging and turning them every which way can take a lot of airspace if you are working on an 8-foot panorama.
Work surfaces should be white or black so you can see things. Not only your tools, but also odd bits of scrap like rogue staples and blade tips that can mar the surface of a giclée. The work surface should sweep or blow clean easily.
Some prefer a carpet surface, but I like matte board as it can be readily cut into and it easily replaceable when it gets too ratty. Under the matte board are two layers of 1/2 –inch Foamcore board and under all that the tabletop. In this way I keep a sharp blade tip longer while doing serious mat-knife work on stuff like Gator Board. Polypropylene cutting boards are terrific, but also terrifically expensive. Glass is best for fine and delicate cutting work using thin materials with razor blades or Exacto® knives.
 The 2-inch borders of this giclée have rulers and 1 1/2 inches of 'Faux Wrap' border. A caption text with the picture's identification can be seen in white.
Trim the giclée to the outer edges of the rulers. Step Four in the book has more information about adding rulers and 'wrapped' borders to giclées. At Vashon Island Imaging (www.vashonislandimaging.com)we always put rulers around the edges of our giclées to make even staple spacing easier.
 The rulers and giclée border wrap should be two inches if you are using 'normal' stretcher bars and three or four inches if you are using heavy duty stretcher bars.
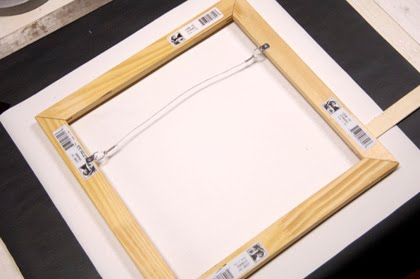
Lay the giclée face down on a piece of Kraft paper that is at least six inches larger. Center the assembled stretcher on the back of the giclée.
 Home-made 'ruler' made of a paint stick is easier to see and faster to use when centering stretcher on back of giclée.
Tack down three sides (top, bottom, right) in their centers. These staples will soon be removed so set them in on an angle, leaving an edge to grab with fine-nose pliers.
 Fine-nose pliers with curved tips make staple removal easier.
 'Tack' staple is shot on angle for easy removal.
Use 1/4-inch staples as deeper ones are harder to remove. The Arrow® front-oriented PowerShot staple gun is easier to use than the traditional type. Of course, power tools are nice but not needed.
Double check now that the orientation of stretcher to the picture is correct... that 'up' is up for both the canvas and stretcher. From now on, backward steps are painful.

Stretch and staple down the left side working out from the center, one staple per inch. Staple spacing is why the rulers are there.
Use only moderate force wrapping the canvas around this first side, but be firm. You’ll see uneven stretching if you pull too hard. It’s important that this side goes down straight and even. Don’t try to pull it too tightly because it is only single-tacked on the three other sides. Those three tack staples were put in to give you 'just enough' anchoring to staple down the fourth side. Getting this first side down straight is your goal.
The opposite (right) side is next. Pull out the tack staple on the right side. Stretch the canvas with some added pressure and apply the first staple dead center.
Some people use special gripping tools, but I use my thumbs to do the work. If you do a lot of stretching, you’ll want to invest in a stretching machine. (You’ll need to do a lot of stretching to pay for it.)
A note of warning to those who stretch a lot of canvas: I have developed occasional problems with thumb splits possibly caused by prolonged contact with varnish while stretching canvases over a period of six years. The skin just splits and the wound is slow to heal. Be careful.
What is tight?
Using your thumbs as I do, there’s a limit to how much pressure you can exert, and that’s probably just enough. If it isn’t enough that will be obvious because the canvas won’t be tight enough.
Your thumbs can’t match a stretching tool or machine, which can stretch giclées almost as tight as a drum skin. However, I find the stretching tool awkward and don’t do enough to justify the costs of a machine (yet).
My advice is that you get to be friends with the stretching tool if you’re going to be doing a lot of stretching. If you stretch occasionally, thumbs will be OK... if you are strong enough. My wife would not be able to get a canvas tight enough using her thumbs and possibly you can’t either.
Whether with your thumbs or a tool, work from the center out. Don’t apply maximum force to the first few staples. Instead, build up the force rapidly reaching full force by the 5th staple.
Work back and forth left to right, one staple every inch. At the 7th staple, pull out the top and bottom tack staples using fine nosed pliers. (They are the ones to the left and right of the side you are working on, side two).
'Full force' does not mean as hard as you can. It means that 'moderate' is less forceful. The idea is to gradually increase the stretching pressure as you work outwards.
With the left and right sides stapled down, fold a variation of 'hospital corners'.
 Modified 'hospital corner' folding. The upper flap folds up and back instead of down.
First step of 'hospital corner' folding procedure.
 Second step of 'hospital corner' folding procedure – upper flap back and tacked.
Using a modified 'hospital-corner' folding technique, the upper-corner folds up and back instead of down. Tack it temporarily into position.
After getting the corners tacked, fold up and staple down that side, starting in the center and working out in the usual manner. Use moderate force on this third side. Save full force for the fourth side, where you will see how much 'full' should be.
By the time you begin the fourth side you should already see that things are going well. If they aren’t stop now and go fix what’s wrong. Continuing will make things worse, guaranteed. Assuming things are OK, use the force necessary to get the canvas as drum-like as you can. You may not be able to use it for your bongo practice, but that’s OK if it looks nice and flat with no stretch marks.
 Ready to stretch last (top) edge.
 Remove corner tack staples when you are two inches away.
Two inches from the corner pull out the staples tacking the upper folds and finish the modified hospital corners. Pulled staples should be put into a little container and not left on the work surface where they can escape and become 'rogues of ruin'.
 Modified 'hospital corners' completed.
 Some people cut out wedges from the corners to avoid bulging. These make cleaner corners that are more squared, fitting into frames better.
Finish with pads on the bottom corners (or all four) to prevent any staples from scratching wall surfaces or table tops.
The larger the picture the more important it is to work from the center outwards. Going back and forth left to right and right to left gets boring, to be sure. Think Zen.
Going too far in any one-direction risks uneven pressures which will show up later. If stretch marks show up, you’ll need to pull all the staples out of the offending side(s) and start over.
Removing staples is a chore. Stretchers made of softwood allow the staples to really sink deep and there’s not enough edge to grasp with needle-nose pliers.
Those staples need to be dug out from under using a small, flat-head screwdriver. Push the flat head under the center of the staple and lever the staple upwards enough to grab it with the pliers. This procedure requiring a deft hand to avoid puncturing the canvas with the screwdriver.
Hardwood stretchers can be infuriating for exactly the opposite reason… staples seem to bounce off instead of sinking in. (The Arrow® PowerShot Pro model does the best job with hardwood stretchers like the ones sold under the Jack Richeson® brand name.
Those must be nailed down with a little hammer. To avoid surface marring during the nailing procedure, place the giclée on a piece of felt or thin, hard carpet.
Now you know why frame shops charge a lot for stretching. There's nothing to it, but it does take time and a certain amount of 'technique' will be learned. The more you stretch, the faster and better you'll get.
There's even more you can find in the book (www.gicleeprepress.com). For now, I think this blog has 'stretched' on long enough.


This is really a great guide. Thanks for sharing such useful information. For people who at some times simply don't have the time or the energy to stretch their own canvas, you can get framed acrylic or canvas prints at affordable price from French Kiss Art
ReplyDeleteGreat guide, I've been stretching canvas now for a couple of years using a Quickmate machine, unfortunately it needs some repairs now which led me here as I'd forgotten how to do it the old school way. Great method and works in a similar way to the way I use my machine, it's not the traditional method but works much better in my opinion, the traditional method is too easy to make mistakes. Anyway, thanks again.
ReplyDelete