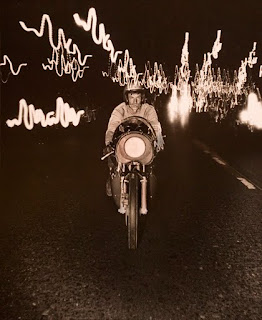
A good road test sees how a motorcycle or car performs when it hits a few bumps in the road. That's something I learned first hand photographing Jess Thomas (above) who was then the technical editor for Cycle Magazine. He'd push gear until it would nearly (and in some cases really) break... and so it goes with the Zen of giclée.
This blog will begin reviewing various products and services that relate to the art of giclée. We'll be road testing them at Vashon Island Imaging, my giclée art printing and publishing company. We're located on Vashon Island, which is known as an artists enclave. As a result we get all kinds of requests to do odd-ball stuff. Our studio is like a science project because we do everything from file capture all the way through mounting, stretching and displaying giclée art. We're 'under the hood' all the time, partly because I am a tinkerer and a perfectionist... like Jess.
Being a wordsmith as well I find it particularly fitting that our 'premier' road test is about a 'Premier' product... Premier Eco Shield, a liquid laminate coating system made especially for giclée prints (http://www.ecoprintshield.com).
Being a perfectionist, I am happy that our premier road test will be about a product whose manufacturer has done an excellent job in terms of education and training... something near to my heart. Their website goes into great detail with slides and videos not only about their products, but also about stretching canvas giclée art.

The first clue that these people 'get it' is their test kit. For about $50 you get a box with three product samples... and a paint-roller kit with the tools needed to apply it. Imagine that, a manufacturer giving you everything you need. What a concept. The company's literature and website instructions are complete, thorough and professionally presented.
Up until now we've been using Clear Shield (http://www.clearstarcorp.com) and have been very happy with it. I explain all about it in detail in my book, Giclée Prepress - The Art of Giclée (ISBN 9780-9865-75112). The book also provides much more detail about coatings in general and a lot more about stretching canvas than you find at the ECO site.
To my mind what you look for in a giclée coating is similar to what you look for in food wrap. For example, if you wrap a peeled onion it is usually for two reasons... to keep the food from going bad and to keep your fridge from stinking of onion. If you can smell the onion then the wrapper isn't really doing a complete job... it's just slowing things down. Is that what you want in a giclée coating? Most people want 'permanence' when they seal their giclée art with a coating or frame it under glass. They want permanent protection from UV light and air pollutants (including moisture and dust). But what is a 'liquid laminate'? ...or even a 'laminate'.
Flooring and drivers' licenses come to mind when thinking about 'laminates'. This durable type of coating is also applied to photos and giclées and is the absolute best protection in the view of this author. However good laminates are, that goodness is offset by their (high) cost which is too much for most artists and photographers.
Until recently coating choices were limited to glass framing, laminating, varnishing or 'spray fixative'. But thanks to the wonders of chemistry we now have 'synthetic' materials which claim to be as durable as the silica and tree sap that glass and varnish are made from. Certainly experience with things like flooring and ID cards has taught us to trust 'laminates' in general.
Lamination works by bonding a plastic coating onto a photograph or giclée. Traditional lamination uses rolls of relatively thick plastic film (2-6 mil and thicker). The lamination 'sandwich' has three layers: the picture, the adhesive, and the coating film. These are bonded together under terrific force through polished steel rollers, sometimes with heat (hot rolled vs cold rolled). Sometimes another two layers -- a substrate and adhesive layer -- are added to the sandwich. As a chain is as strong as it's weakest link, a lamination is only as good as the bonding material. Enter liquid lamination technology.
Liquid lamination is a chemical marvel. The ingredients necessary to make plastic film are dissolved in water. The liquid seeps into the microscopically small 'crevices' across the surface of the picture, depositing the film ingredients to the very 'pores' of the piece. As the water evaporates, the film ingredients 'cure' to form a new substance... the plastic film coating. With Clear Shield the result is something akin to Saran Wrap, as you can see from this picture.
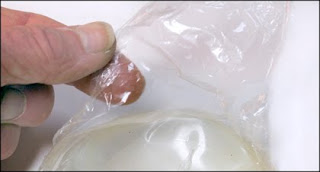
Whether ECO Print Shield is like Clear Shield remains to be seen... I have left a spoonful to cure in a yogurt container (to duplicate the way the pictured Clear Shield sample in the picture above was made) and we should see the result in a few days.
For the record, the manufacturer says that the product is: "...a unique combination of acrylic resins with a new cross-linking technology which seals the print, prevents cracking when stretching canvas and will never go brittle. Compatible with dye, pigment and eco-solvent inkjet inks." They say it will never yellow... time will tell.
The two products smell quite different and ECO Print Shield gunks up the sprayer much faster than Clear Shield. Since the folks at ECO say you can use brush cleaner to clean-up dried coating that suggests that their product is more like an acrylic paint. Whether or not that is correct or 'better' I cannot say... but I'll bet that either will outlive me.
You might ask, if we're so happy with Clear Shield then why change? Well, we were once happy with varnish but found matte finishes difficult to do without spraying... and spraying releases too much solvent into the air for my liking. Then there's the Zen of coatings... the 'creative' part... fun with finishing.
I am very much into customized coatings and creative coating effects. These are described in my book in detail, as is how the dynamic tone range of a picture is affected by the type of coating that is applied. The more glossy a coating the deeper the blacks. Matte coatings move the black point right off the histogram... the darkest tones are shades of gray not black. By blending you can customize the coating to enhance a picture's total look rather than 'fight' it. That is, you wouldn't want to put a matte coating on a picture of a coal mine.

ECO Print Shield comes in three types: Matte, Satin and Gloss. According to the manufacturer two coats of gloss are always laid down first then the final look is made with either of the other two or some blend of them as a third coat. A certain thickness must be achieved and at the ECO website you'll find their simple test (be forwarned that it involves 'cracking' your canvas).
The reason for the double dip of gloss first is to maintain dmax in the blacks. If you really want matte matte you can skip one or both of the gloss coats and replace them with either satin or matte, as we do with Clear Shield all the time.
As much as we appreciate the roller set included in the sample pack at Vashon Island Imaging we spray liquid lamination. We used to use rollers and perfected ways to do so that involve no clean-up. Say what? You heard right... it's all in the book. But nothing can beat spray for a nice even look... that is if you use a good sprayer and not the little cans that are like hair spray... you will never get an even coating on a big print with those unless you're doing wallet-sized prints.
From a cost perspective, Clear Shield and ECO Print Shield are 'comparable' with Clear Shield being slightly more expensive. Be sure to compare apples with apples when shopping for Clear Shield because it comes in many flavors and only Type 'C' is for giclée prints. With ECO Print Shield the situation is far less confusing because there aren't as many types to choose from.

As with Clear Shield, the ECO products spray on with a 'milky' look if the coating is just right, as seen above. This is a tricky business because you want a good coating but it's easy to apply too much and flood the canvas. If that happens the solution will 'pool' if the canvas is flat or drip if it is on angle or vertical (as I prefer to shoot). Better to under-do it than over-do it. ECO Print Shield instructions call for a minimum of three coats. I found that for a good even gloss I needed to shoot five coats... but I may be spraying thinner than they specify.
Spraying procedures are the same for both Clear Shield and ECO Print Shield. The first (gloss) coat is sprayed on 'thin'... the giclée should still be able to 'breath'. Let that coat dry thoroughly (up to an hour depending on the humidity). The next (gloss) coat can be a bit heavier but not as heavy as the finish coats. The purpose of these initial coats is to seal the giclée. The final coats will create the look.
For the test I selected four 20 X 30 pieces. Two were printed on Epson Satin Canvas and the other two on Epson Matte Canvas. One The satin canvas giclées received two base coats of gloss, the matte-canvas ones got only one gloss base coat. Then one of the satin-canvas pieces got 3 more coats of gloss and the oher 3 coats of satin ECO Print Shield. One of the matte-canvas pieces similarly got 3 coats of satin whereas the other was finished with three coats of matte. My 8-ounce tester bottle of ECO Print Shield gloss provided sufficient coverage to shoot 6 thinner base layers and four heavier finish coats. That coverage would have been enough for two 20 X 30's if both were finished gloss... that is, two base coats and three finish coats each. That translates into eight 20 X 30's per quart, or about $2.50 each, based on $80/gallon... or about 60¢ per square foot.
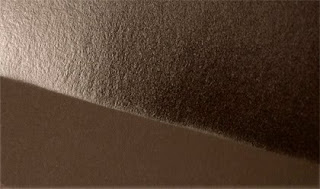
Matte ECO Print Shield completely destroys dmax... much more so than Clear Shield matte. I quit after only two finish coats on the print I was shooting it on. Then I went back over the parts that needed dmax with some satin and blended that in, which helped a lo to bring back some of the blacks a bit. Clear Shield matte turns blacks into a 90% gray. ECO Print Shield turns them into something like 70% gray by comparison. We will probably not use much of that one. The gloss is nice and glossy, as it should be.
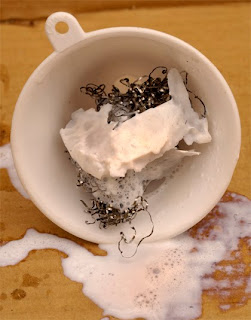
Satin ECO Print Shield almost never made it into the road test because of the crap that poured out of the container... huge chunks of cured solution got caught in in the funnel filter.
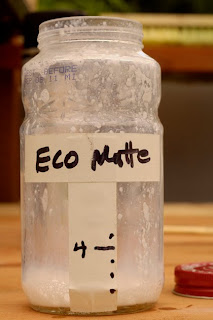
The residue on the mixing bottle (above) looked so awful that I was afraid to run it through my gun, but in the end I did. The fact that its container was the only one of the three that had an extra seal should have been a clue that it was different than the other two. To be fair, the results look good... although I did have to fish some tittle white bits from the prayed surface using a toothpick while the coating was still wet.
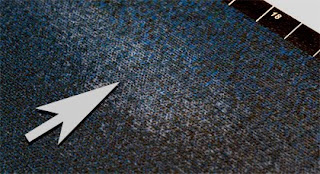
I started to run out of the satin and started diluting it more than they say to which is 20%. It's hard for me to say what dilution ratio I hit but I did over-do it. To prevent runs and drips I had to quickly lay the print down (I was shooting it vertically). The picture above shows what the satin coating looks like when the stuff is too thinned out... you can see it 'pooling' in the deeper parts of the canvas weave.
I eased off the trigger and by very lightly spraying the thinned out coating I was able to squeak through the road test. Total cost for the test was $55 for the starter kit. Divvied up between four 20 X 30's that's 12.50 each... you can calculate your own testing costs based on that coverage.
At the bottom of the last page of the roller-coating instructions there is a caveat that seems to warn about letting two coated giclées come into contact with one another for fear of bonding between the coated surfaces. It is unclear whether that means before they are totally cured or (forever) after. If forever, what a disappointment. It was for such problems that we've more or less switched away from varnish in favor of liquid laminates. We have had no problems with Clear Shield coated giclées sticking together. Whether we will encounter the sticking issues with fully cured Eco Print Shield remains to be seen. Stay tuned.
Footnote: it turns out that you can teach an old dog new tricks after all. From the ECO site I earned that it is a good idea to coat your wooden stretcher bars with either a pre-wrap of canvas or a sealer. This protective covering prevents wood acids from penetrating the giclée canvas, shortening it's life. Makes sense. Of course, I'm not sure I would use super-expensive sealers like ECO Print Shield and Clear Shield for that... I'd probably opt for any cheap primer.


Very interesting and helpful information. We have been struggling with hand roller application of the Eco Print Shield especially with large prints. Have watched the tutorials and they were helpful but it takes exact technique to get great results. Any additional information on this road test?
ReplyDeleteHi Douglas- Thank you for your article, this was very informative and helpful. I use Lyve canvas and I've been struggling with the rollers. I can't seem to find the right one. It always leaves streaks and I'm still not sure how to stop that from appearing. Could you tell me where I can purchase those rollers you had in the image above there? Thank you.
ReplyDeleteWhere can I purchase your book Giclée Prepress - The Art of Giclée (ISBN 9780-9865-75112)?
ReplyDeleteThank You
I was looking at some of your posts on this website and I conceive this web site is really instructive! Keep putting up.. Road Tests NY
ReplyDelete